Firebase Configuration
Setting up Firebase for your Handyman Service Project
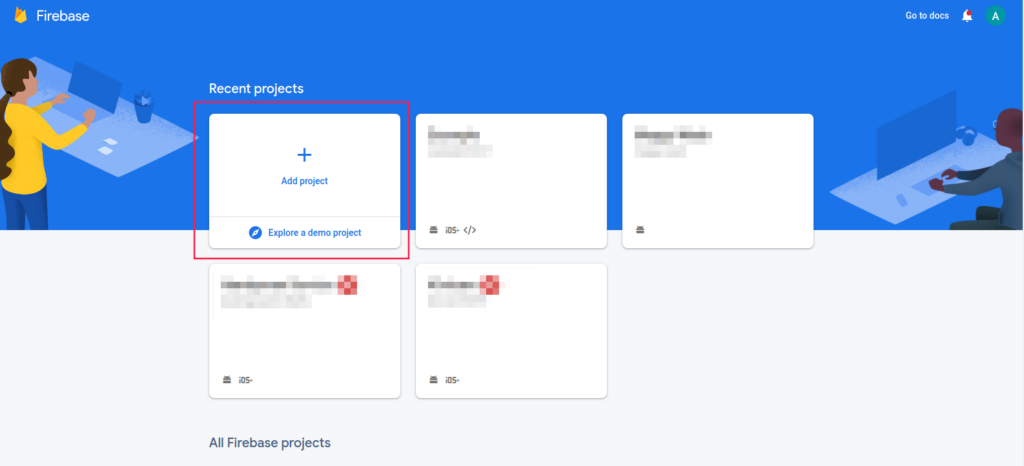
Create A New Firebase Project
We are creating the "Example" sample project.
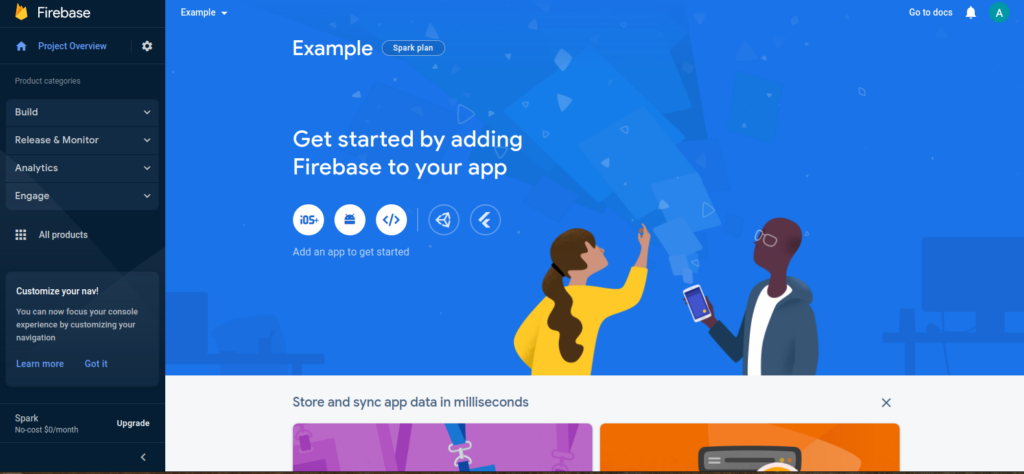
After completing the project, you will be presented with this type of dashboard.
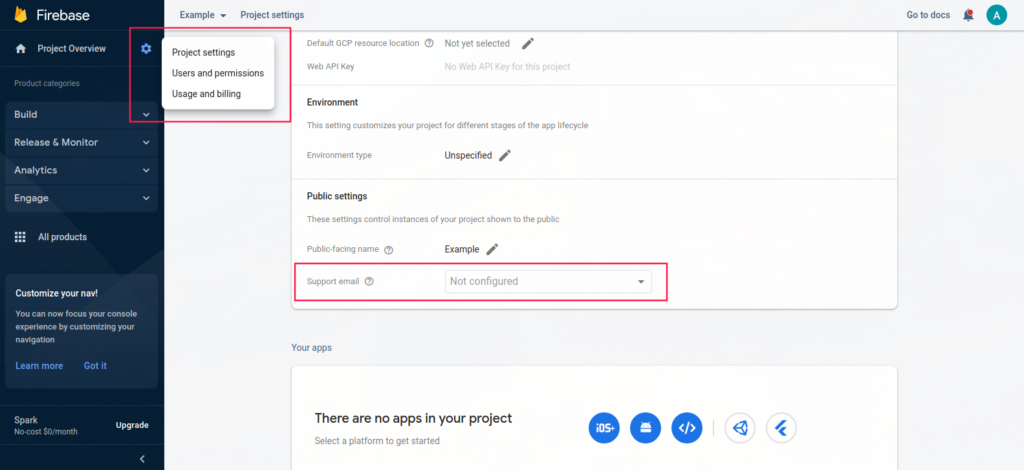
Go to the Project Settings and configure the Support Email.
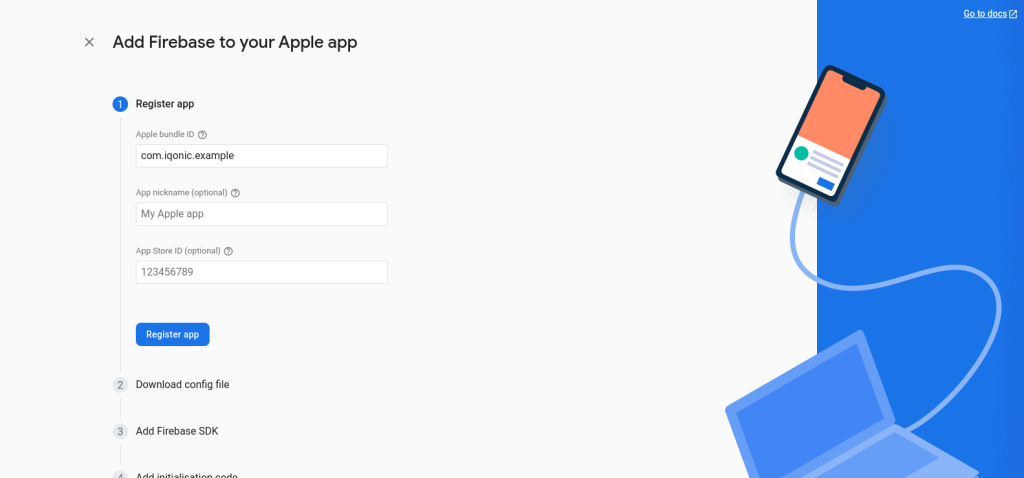
Add App With The Package Name In Firebase Console
On the Firebase console, click the Android icon.
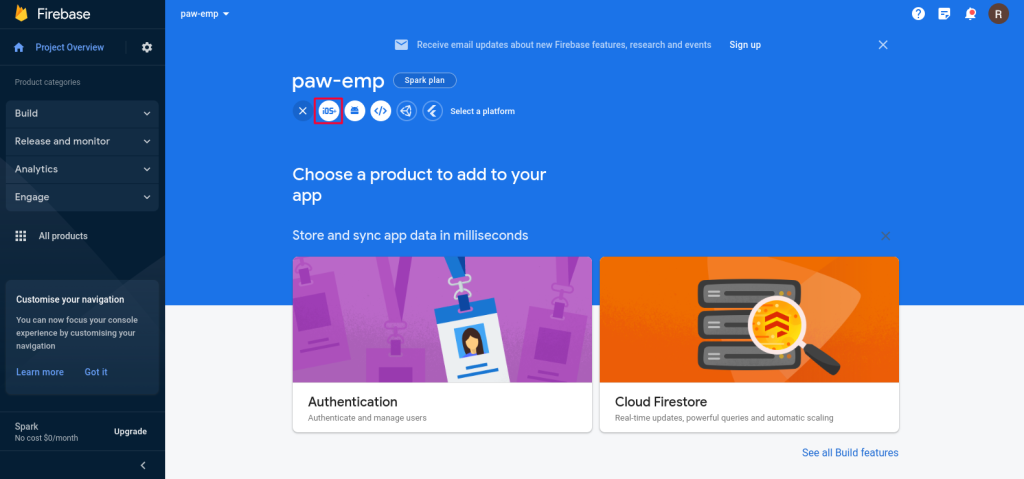
Enter Package Name (e.g., com.example.userApp) and click on register app.
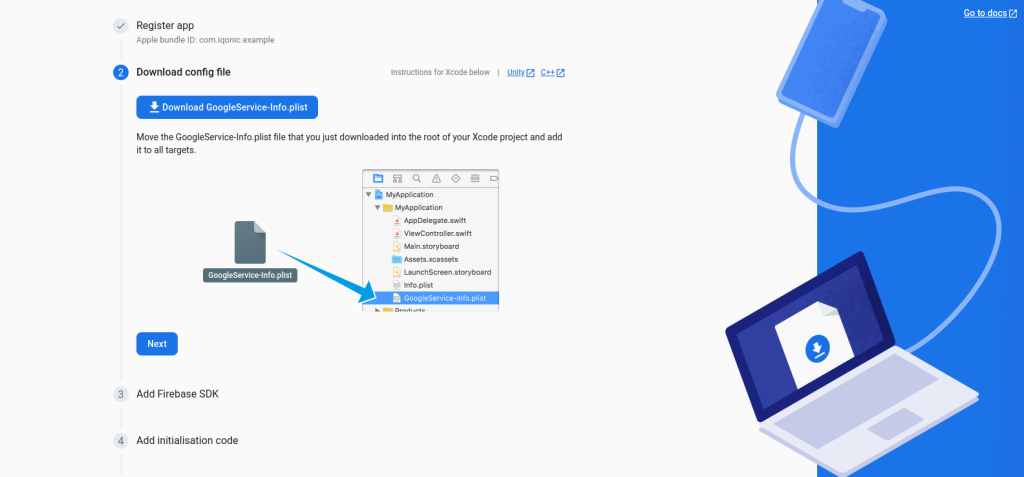
After registering the app, you will receive the Google JSON file, download it and save it to the android/app/ folder.
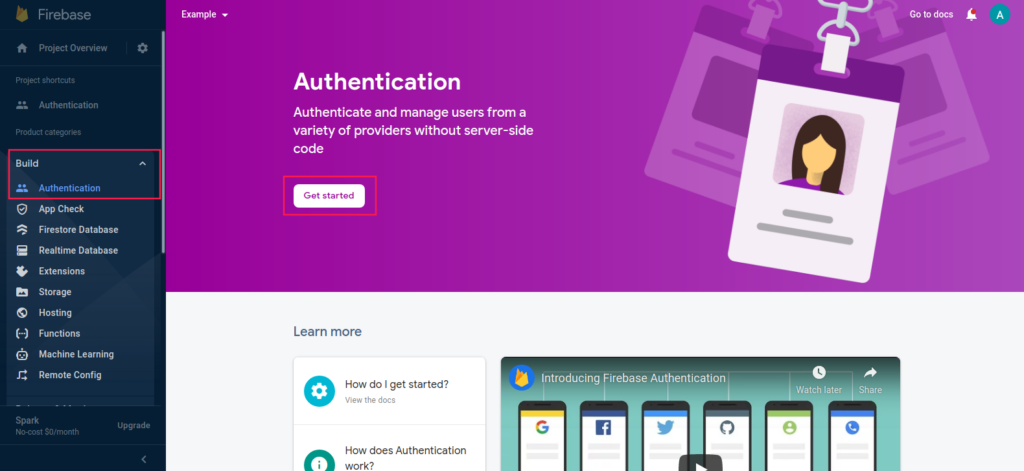
Set Up Firebase Authentication
Go to Build -> Authentication tab and click on Get started.
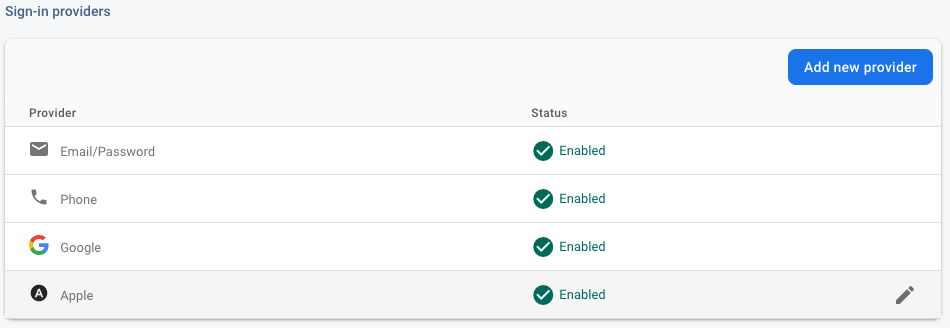
Then select the Email/Password, Google, Apple, and Phone Number one by one and enable them.
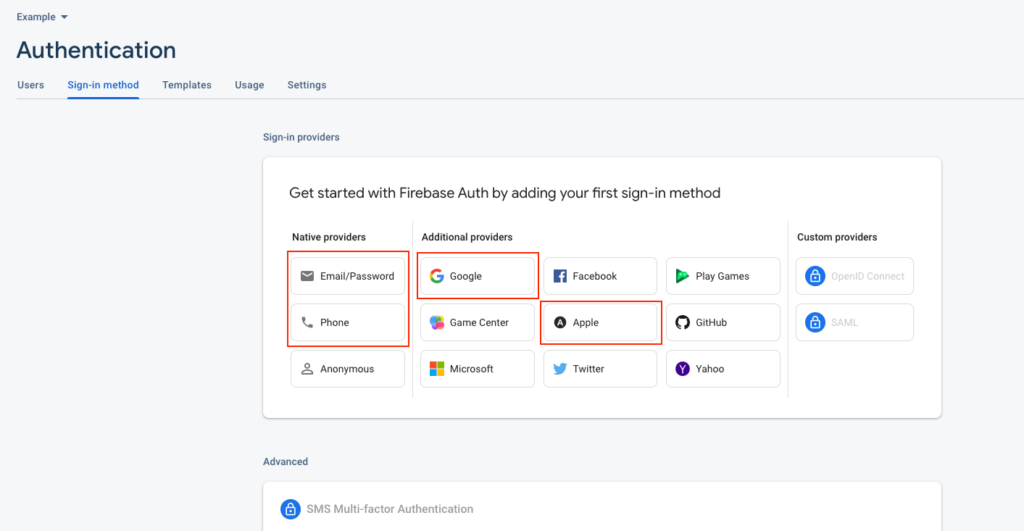
Re-check if all these 3 modes of authentication are enabled or not.
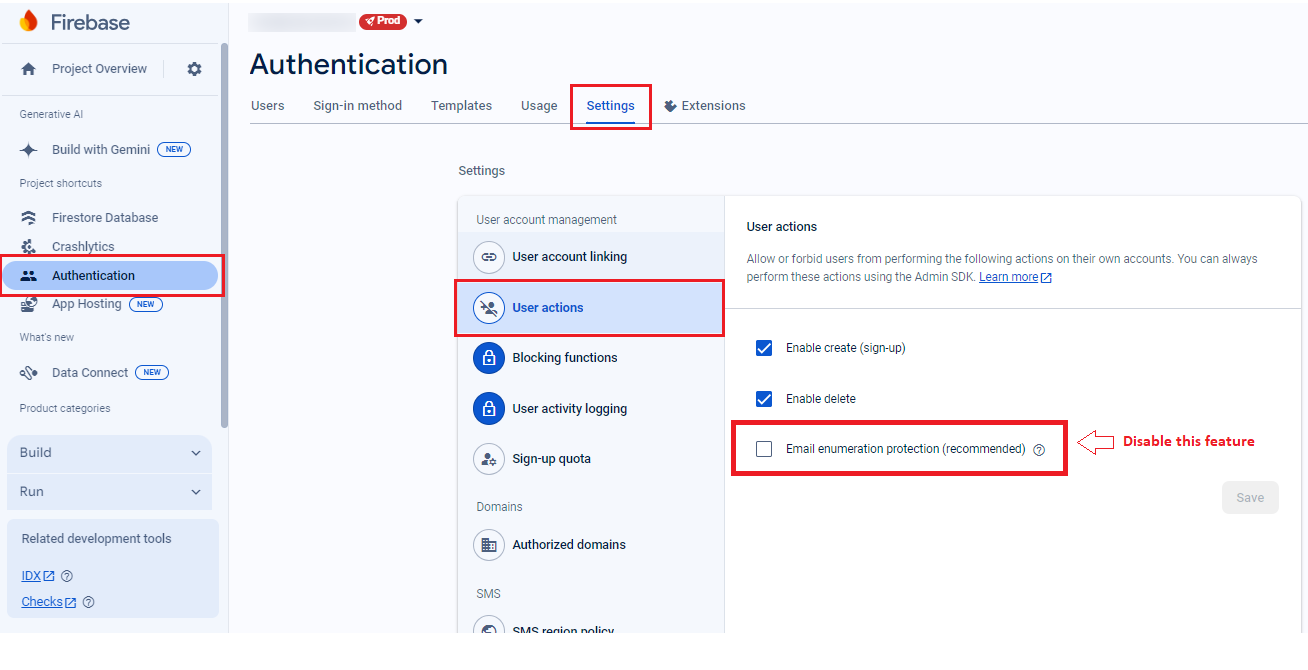
For Connecting Chat server
- Click on Setting tab
- Select Users Action
- Disable "Email Enumeration Protection" option
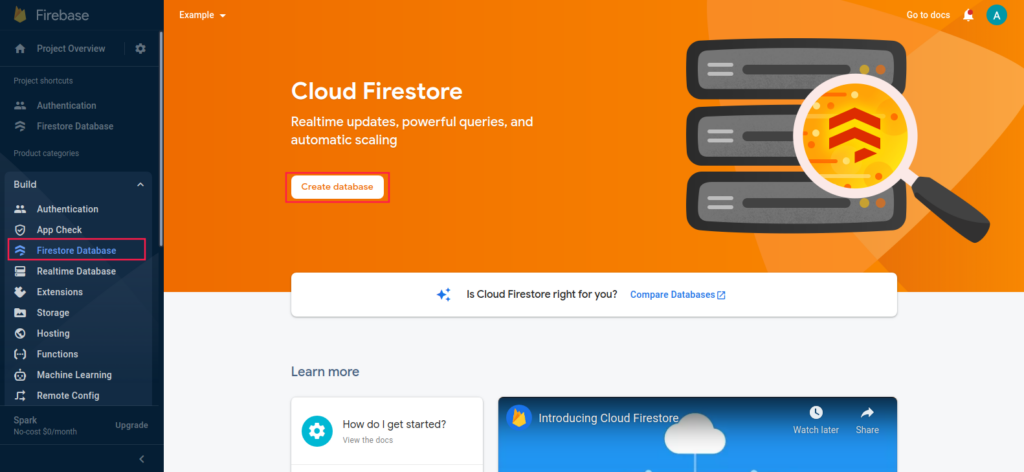
Activating The Firestore Database
Go to Build → Firestore Database tab and click on Get Started.
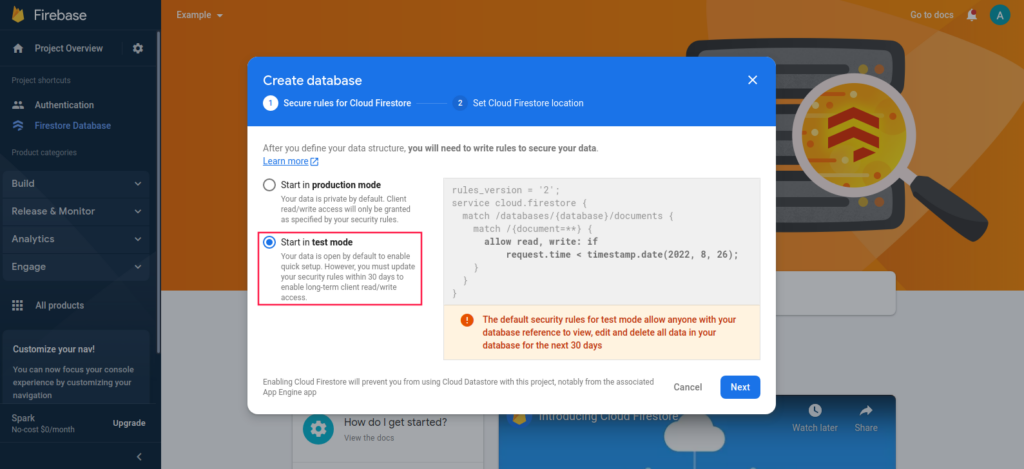
When you click the Get Started button, a dialogue will appear asking you to choose a mode. Because we are testing, we will select the Start in Test Mode option and then click Next and then enable it.
Change the Firestore's rules to save the data in a database.
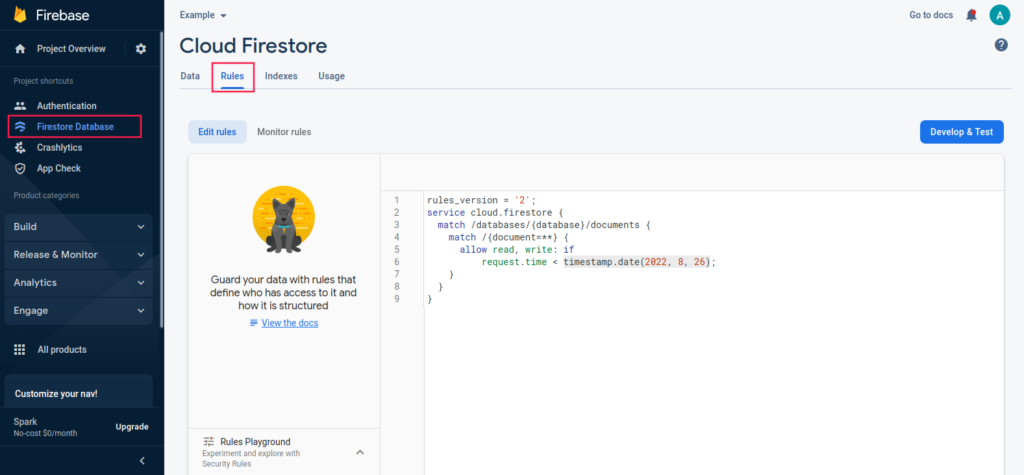
Before Changing Rules:
rules_version = '2';
service cloud.firestore {
  match /databases/{database}/documents {
    match /{document=**} {
      allow read, write: if request.time < timestamp.date(2022, 8, 26);
    }
  }
}
After Changing Rules:
rules_version = '2';
service cloud.firestore {
  match /databases/{database}/documents {
    match /{document=**} {
      allow read, write: if request.auth != null;
    }
  }
}
SHA Fingerprint
SHA-1 fingerprint is a unique key generated for your PC that can be used for signing. It is important to have in the add Firebase as we are using Google Login and OTP Login, and to authorize these logins, we need a SHA Fingerprint certificate
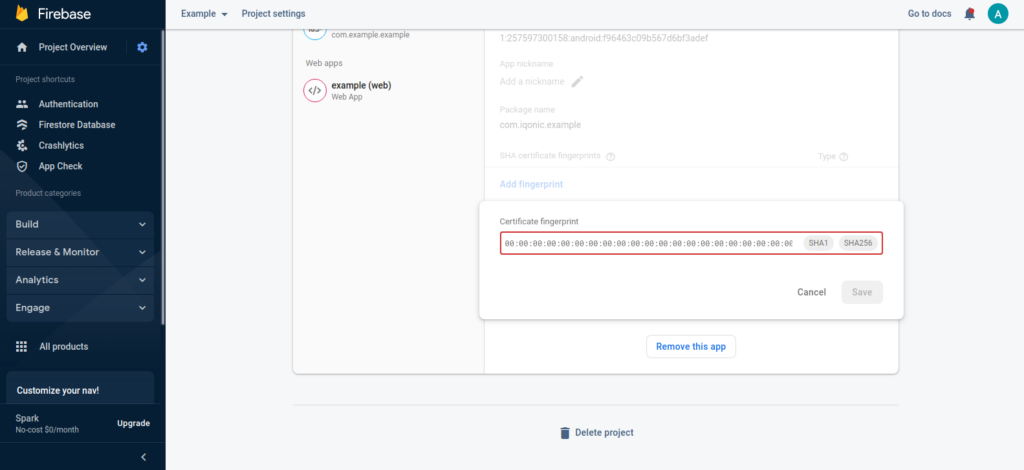
Add a SHA fingerprint to Firebase:
Follow these steps if you didn't initially provide a SHA certificate fingerprint for your Firebase Android app or if you need to add an additional one:
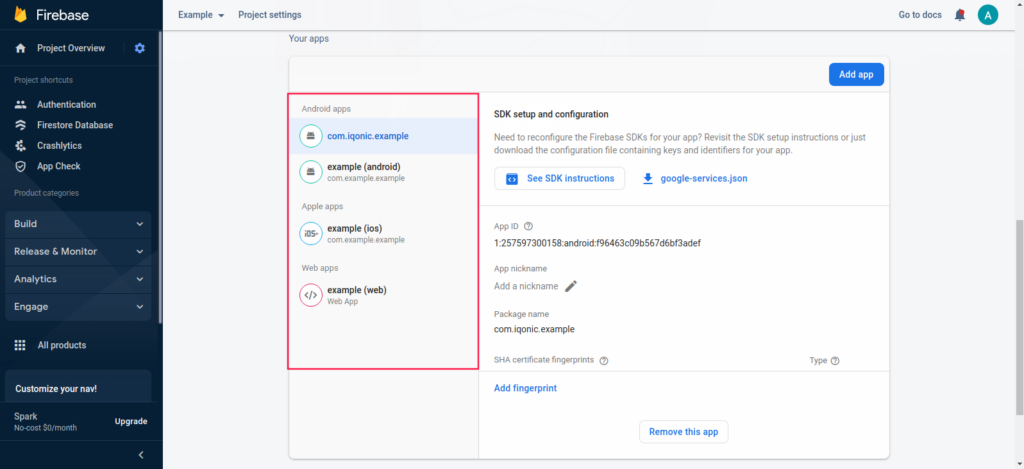
- In your Project settings, go to the Your apps card.
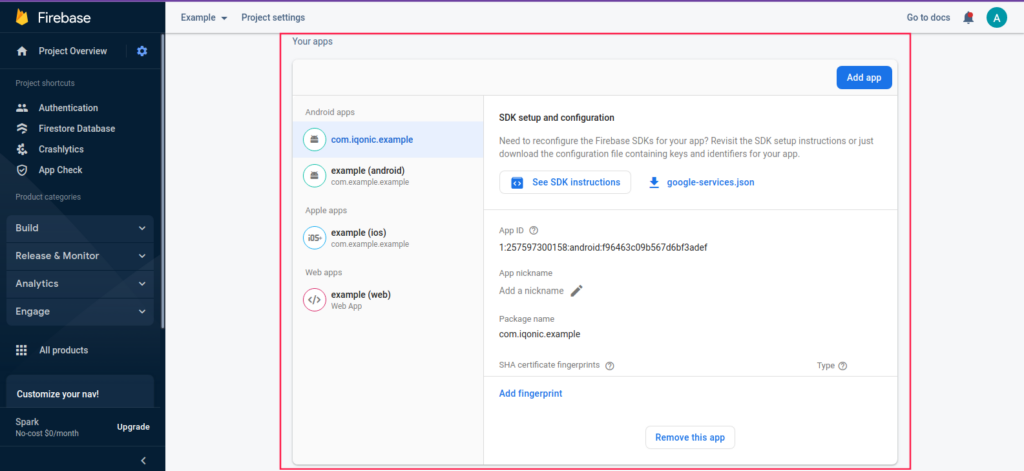
- Select the Firebase Android app to which you want to add a SHA fingerprint.
- Click Add fingerprint.
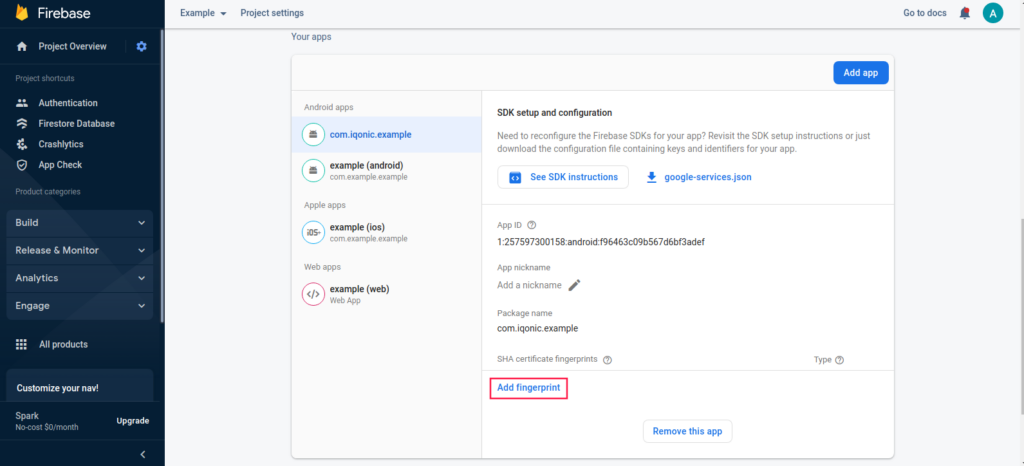
- Enter or paste the SHA fingerprint, then click Save.
How to generate the SHA from Android Studio:
Fingerprint. Here we will see how to generate both types of SHA Fingerprint.
Add .p8 Certificate to enable OTP Login in iOS
Login into Firebase and select your project.
Go to the Project Settings and select the Cloud Messaging section.
Scroll down to find the Apple app configuration section and select your iOS build identifiers that you have used for the Customer App.
You will see an Upload APNs auth key popup. Drag or select your support.p8 certificate.
Add your Key ID and Team ID.
Enable Firebase Notification in Mobile for Both Android and iOS
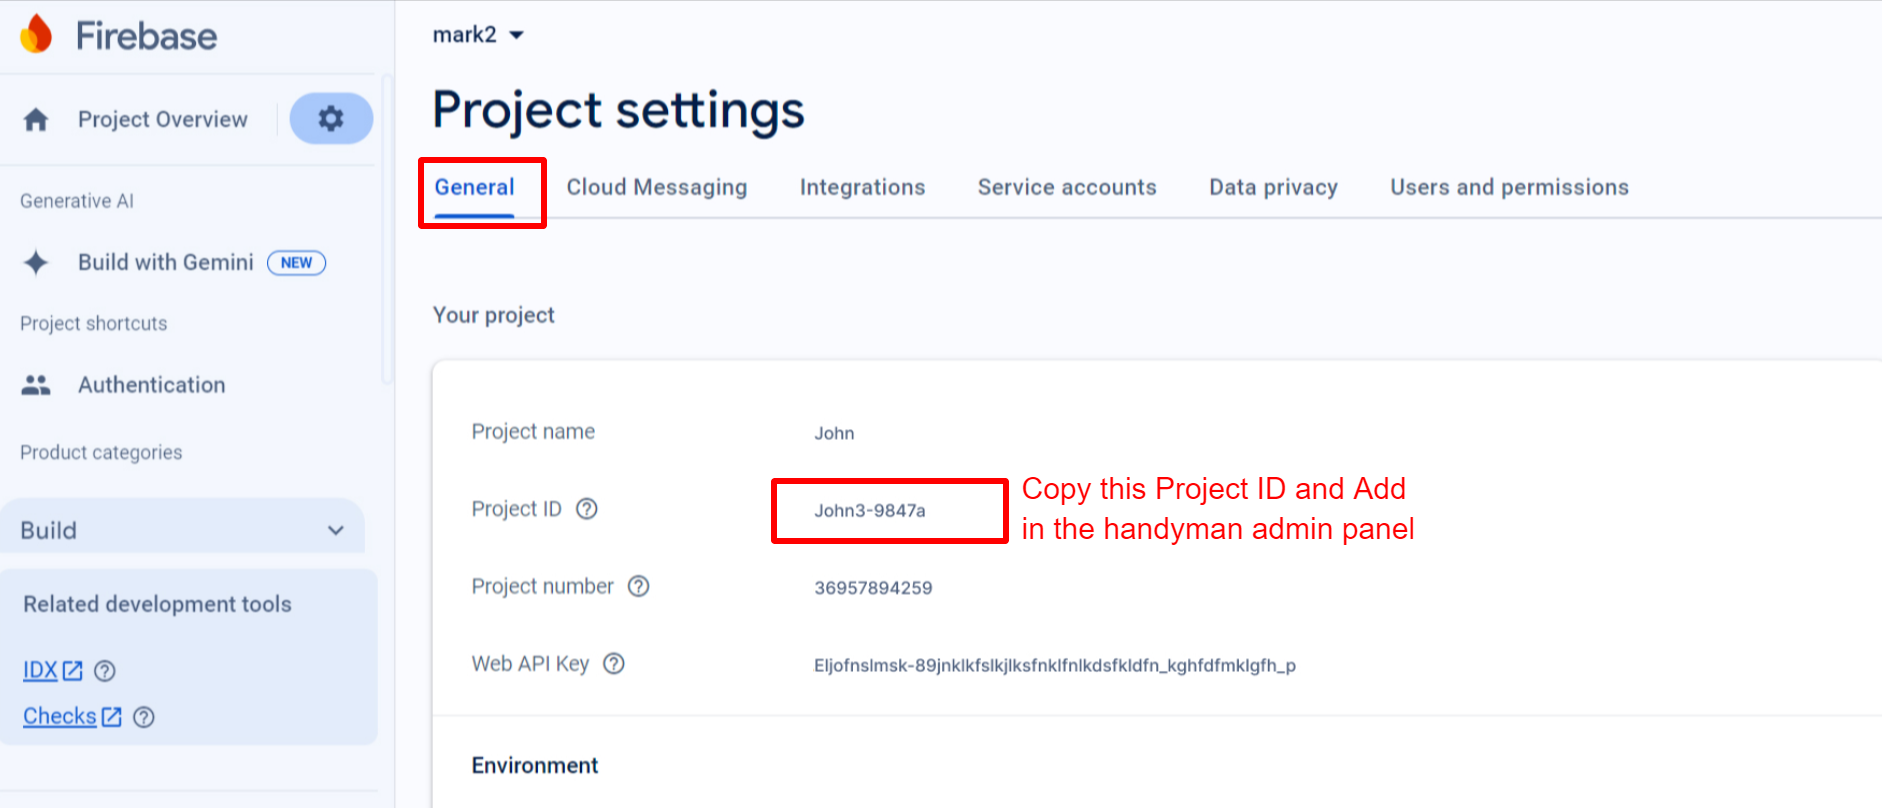
Obtain Project ID From Firebase
Click on Project Overview → Project Settings → General
In General Settings Copy the “Project ID from Firebase”
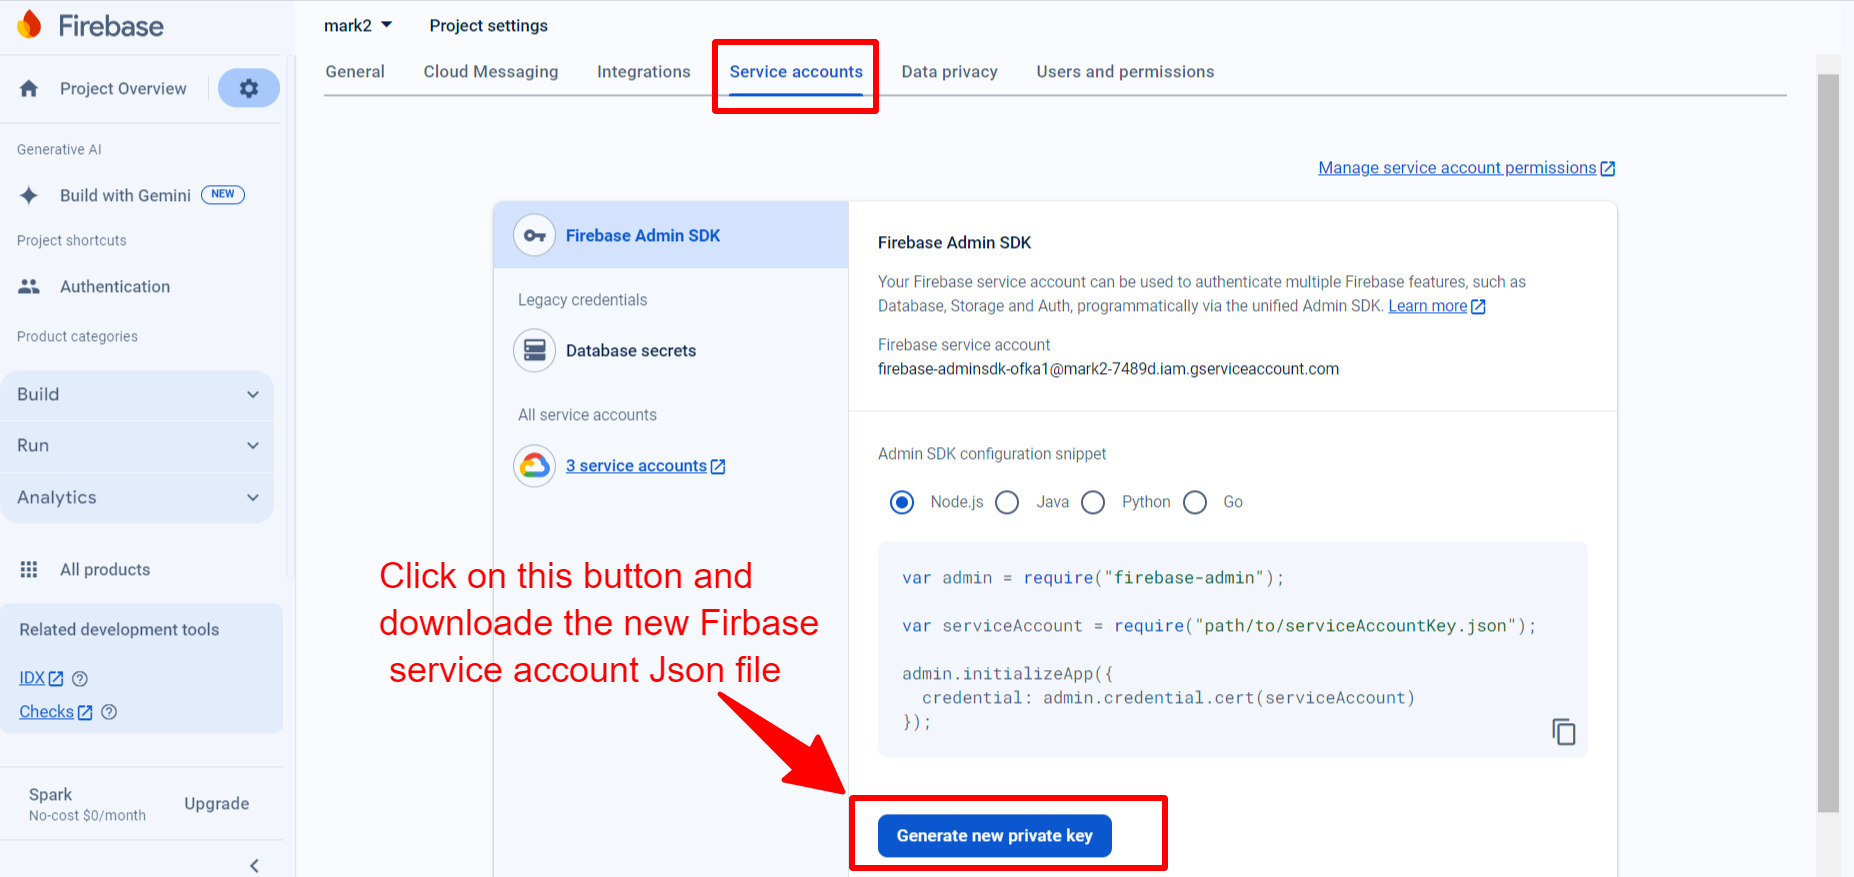
Obtain Firebase Service Account Json file
Click on Service accounts in the project Settings.
Click on Generate new Private key Button and Download the service Json file.
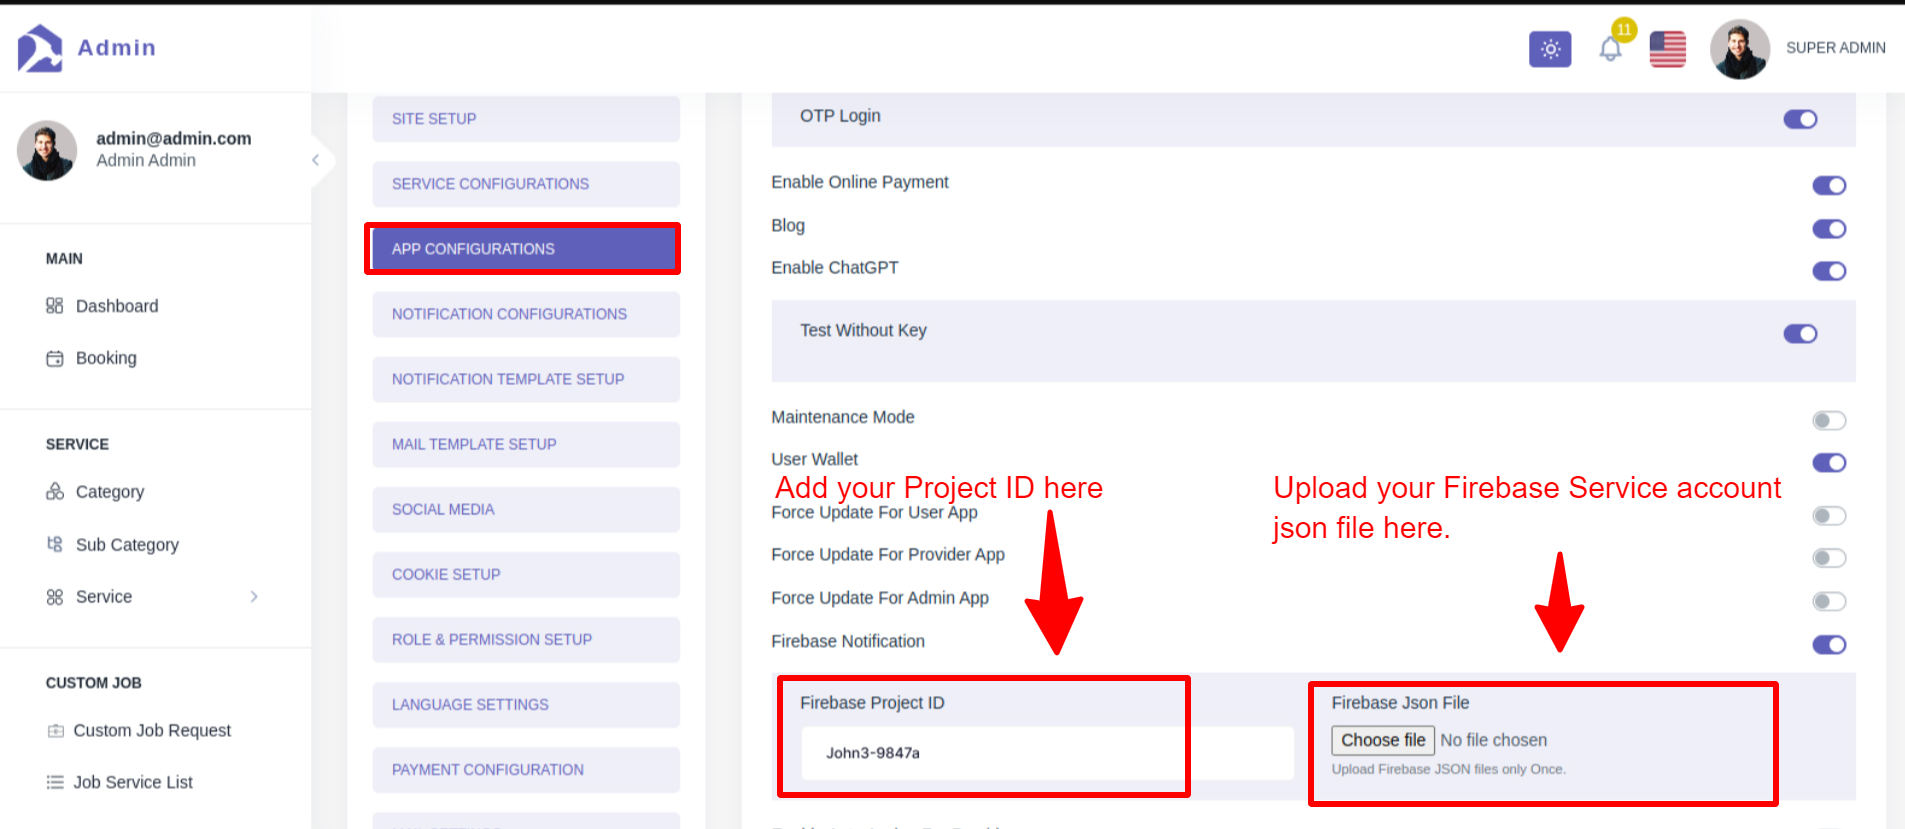
Add Firebase Project ID and Service Account Json file to Admin Panel
Go to the Admin Panel, select the "Setting" option in the left sidebar under the System section.
Select "App Configuration Setting" and enable Firebase Notification.
Add your Firebase Project ID and Upload your Firebase Service Account Json file and click on * *Save** Button.
If Service Account Json file upload fails due to permission issue or any other reason then,
- Open your backend code.
- Create folder with name "data" inside storage → app
- Place the Service Account JSON file inside the "data" folder.
For iOS:
- Create APNs Certificate, please visit the documentation and follow step 3.
- Log in to Firebase and select your project.
- Go to the Project Settings and select the "Cloud Messaging" section.
- Scroll down to the Apple app configuration section and select your iOS build identifiers used for the Specific App.
- You'll get an "Upload APNs Certificates" popup, then drag or select your support.p12 certificate.
After that, add the below code in AppDelegate.swift file under ios folder in your project:
if #available(iOS 10.0, *) {
  UNUserNotificationCenter.current().delegate = self as? UNUserNotificationCenterDelegate
}
Great! You Have Successfully Configured Firebase!