iOS Configuration
Setting up IOS for your Handyman Service Project
Open Project in Xcode
Open Xcode on your Mac computer.
In Xcode, go to the File menu and select "Open" or use the keyboard shortcut
Command + O.Navigate to the directory of your Flutter project on your computer.
Inside your Flutter project directory, locate the ios folder and open it.
Look for a file with the extension ".xcworkspace" or ".xcodeproj" within the ios folder.
This file represents your Xcode project for the Flutter app.Select the ".xcworkspace" or ".xcodeproj" file and click on the "Open" button.
Xcode should then open your Flutter project, allowing you to build, run, and modify your iOS app using the Xcode IDE. Please note that before opening your project in Xcode, you need to ensure that you have set up Flutter and the necessary dependencies for iOS development.
Change Bundle Name
Select your project file icon in the Group and Files panel.
In the Xcode navigation pane, find and select your project file (usually denoted by the blue icon with your project name).
In the main editor area, you should see the project settings. Select the target for which you want to change the Bundle Name. Targets are usually listed under the Targets section in the project settings.
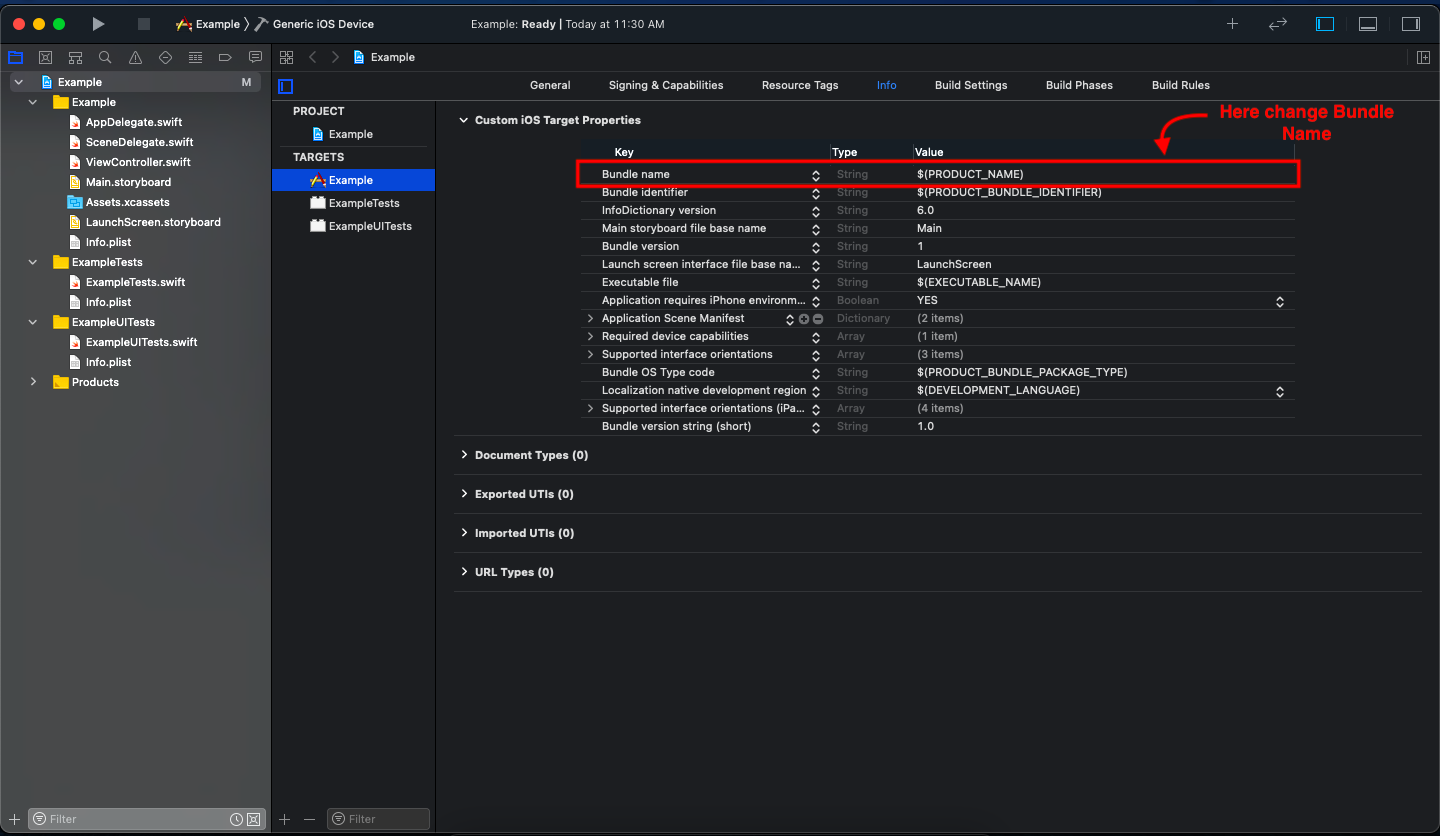
With the target selected, navigate to the "Info" tab.
Scroll down to the "Custom iOS Target Properties" section, and locate the "Bundle Name" key.
Double-click on the value field next to "Bundle Name" and enter the desired name for your bundle.
After changing the Bundle Name, make sure to save your changes by clicking on the "File" menu and selecting "Save" or using the keyboard shortcut "Command + S".
By following these steps, you can change the Bundle Name for your iOS target in Xcode.
Change Bundle Identifier
The Bundle Identifier is a unique identifier of your app on iOS and macOS. It must be unique for your app.
Select your project file icon in the Group and Files panel.
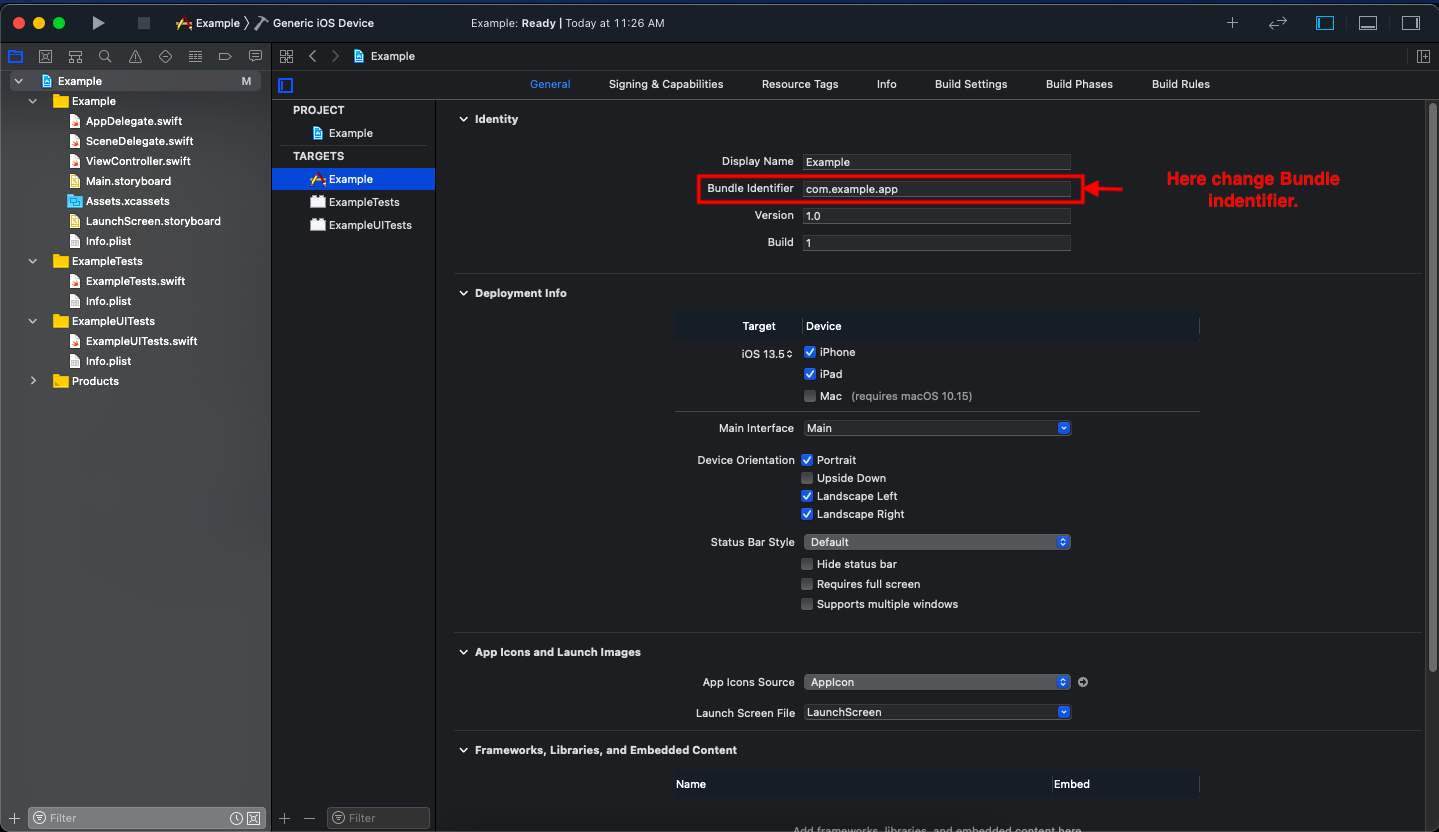
Select the General tab.
In the Identity section, rename your Bundle Identifier.
Change App Icons
The basic process of this website is -
- Choose Asset type
- Basic Configuration
- Choose Device Type
- Generate and Get the Zip
- After extracting zip you get ios folder. Copy all inside ios folder and paste it into ios/Runner/Assets.xcassets/AppIcon.appiconset
Google SignIn
To enable Google SignIn in your app:
Register your app on Firebase.
Make sure that GoogleService-Info.plist is the name of the file you downloaded from Firebase.
Move or copy the GoogleService-Info.plist into the [My_project]/ios/Runner folder.
Open Xcode, right-click on the Runner directory, and select Add files into Runner.
Select the GoogleService-Info.plist file from the file manager.
In the dialog that appears, select the Runner target.
Add the following CFBundleURLTypes attributes into the [My_project]/ios/Runner/Info.plist file.
Run your project.
<key>CFBundleURLTypes</key>
<array>
    <dict>
        <key>CFBundleTypeRole</key>
        <string>Editor</string>
        <key>CFBundleURLSchemes</key>
        <array>
            <!-- Replace this value with the REVERSED_CLIENT_ID copied from GoogleService-Info.plist -->
            <string>Enter your REVERSED_CLIENT_ID</string>
        </array>
    </dict>
</array>
SignIn with Apple
To enable SignIn with Apple in your project:
Open the project in Xcode.
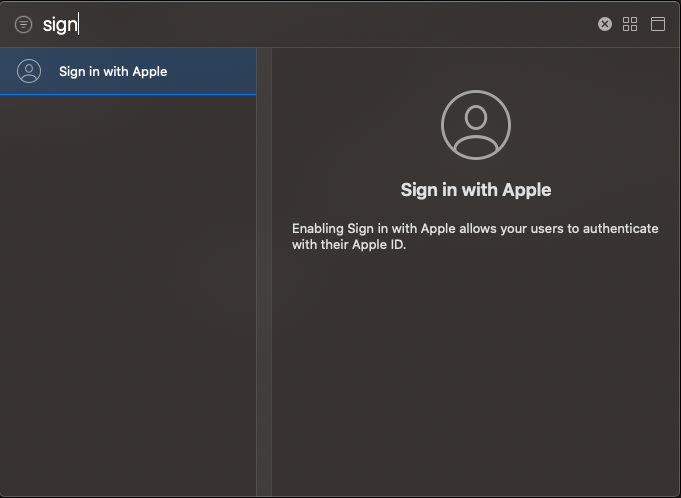
Go to the Project Editor, choose your target, and open the Signing & Capabilities panel.
Click the Library button (+) to open the Capabilities library (or choose Editor > Sign in with Apple).
Run your project.
Generate .p8 Certificate
Log in to App Store Connect.
Select the Keys option from the left panel.
Click on the Add Key button.
Add a Key Name and select the Apple Push Notifications service (APNs) option.
Click on Continue and download the support p8 certificate.
Great! You have successfully performed the necessary steps in Xcode.