Flutter Configuration
Estimated reading: 1 minute
Setting up Flutter for your KiviCare - Laravel Project
Change App Name
In the main directory, go to lib → configs.dart
const APP_NAME = 'YOUR APP NAME';
Reconfigure Server URL
In the main directory, go to lib → configs.dart
const DOMAIN_URL = "ADD YOUR DOMAIN URL";
Change Default Language
In the main directory, go to lib → configs.dart
const DEFAULT_LANGUAGE = "LANGUAGE CODE"; // (e.g., "en", "ar", "de", "pt", "es")
- Set the language code from the provided list ["en", "ar", "de", "pt", "es"] for supported languages in the application. For other languages, customization is required.
- Use only the language code, not the entire language name. You can find the language codes here.
Change App Font
In the main directory, go to lib → app_theme.dart
fontFamily: GoogleFonts.FONT_NAME().fontFamily,
textTheme: GoogleFonts.FONT_NAMETextTheme(),
Remember to apply these steps to both the DarkTheme and LightTheme in the app_theme.dart file to ensure consistent behavior across your app's themes.
Change Primary & Secondary Color
In the main directory, go to lib → utils → colors.dart
const appColorPrimary = Color(0xFF5670CC);
const appColorSecondary = Color(0xFFF67E7D);
Best practice and setting the hex value after 0xFF, you can avoid unexpected color rendering issues and ensure consistent appearance of your UI elements.
Update Notification Icon Name
After creating notification icon you can perform this change.
- Open lib → utils → push_notification_service.dart.
- In showNotification() method find lines below
const AndroidInitializationSettings initializationSettingsAndroid = AndroidInitializationSettings('@drawable/YOUR NOTIFICATION ICON NAME');
var androidPlatformChannelSpecifics = AndroidNotificationDetails(
    'notification',
    'Notification',
    importance: Importance.high,
    visibility: NotificationVisibility.public,
    autoCancel: true,
    //color: primaryColor,
    playSound: true,
    priority: Priority.high,
    icon: '@drawable/YOUR NOTIFICATION ICON NAME',
  );
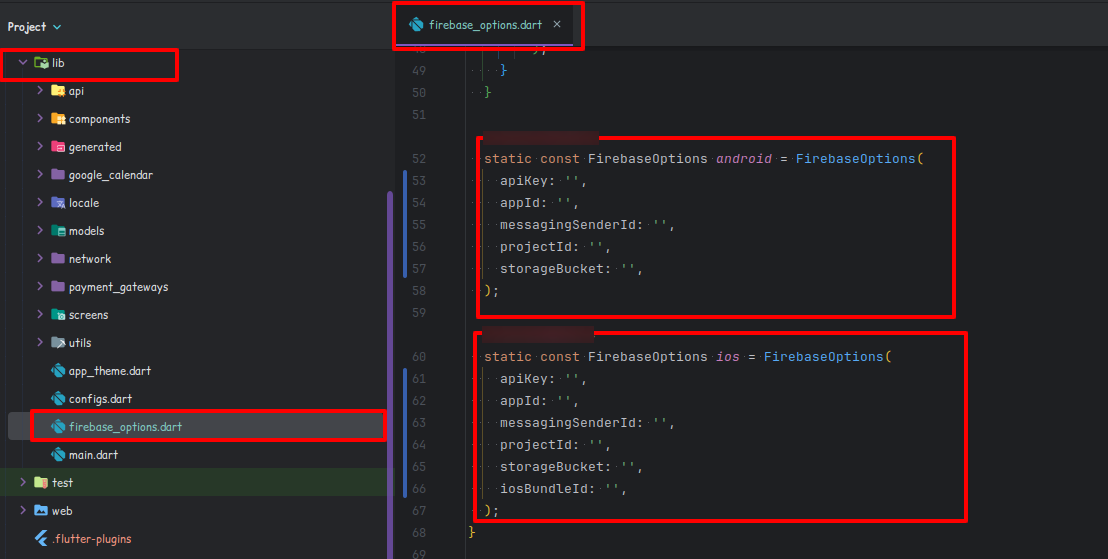
Add FirebaseOptions
After completion of Firebase Configuration you can proceed further.
In the main directory, go to lib -> firebase_options.dart and update values for respective object.
static const FirebaseOptions android = FirebaseOptions(
  appId: "FIREBASE ANDROID APP ID",
  apiKey: 'FIREBASE API KEY',
  projectId: 'FIREBASE PROJECT ID',
  messagingSenderId: 'FIREBASE SENDER ID',
  storageBucket: 'FIREBASE STORAGE BUCKET',
);

static const FirebaseOptions ios = FirebaseOptions(
  appId: "FIREBASE iOS APP ID",
  apiKey: 'FIREBASE API KEY',
  projectId: 'FIREBASE PROJECT ID',
  messagingSenderId: 'FIREBASE SENDER ID',
  storageBucket: 'FIREBASE STORAGE BUCKET',
  iosBundleId: 'FIREBASE iOS',
);
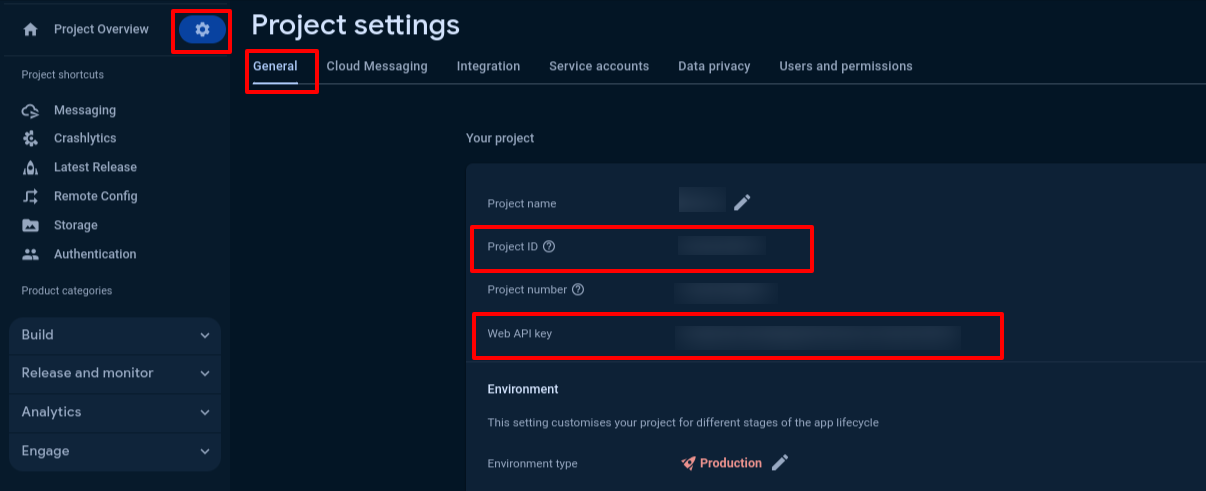
- Open your Firebase Console.
For apiKey
Go to Project Settings and click on General tab you’ll find Web API Key and Project ID and paste it all blocks in dart file mentioned above.
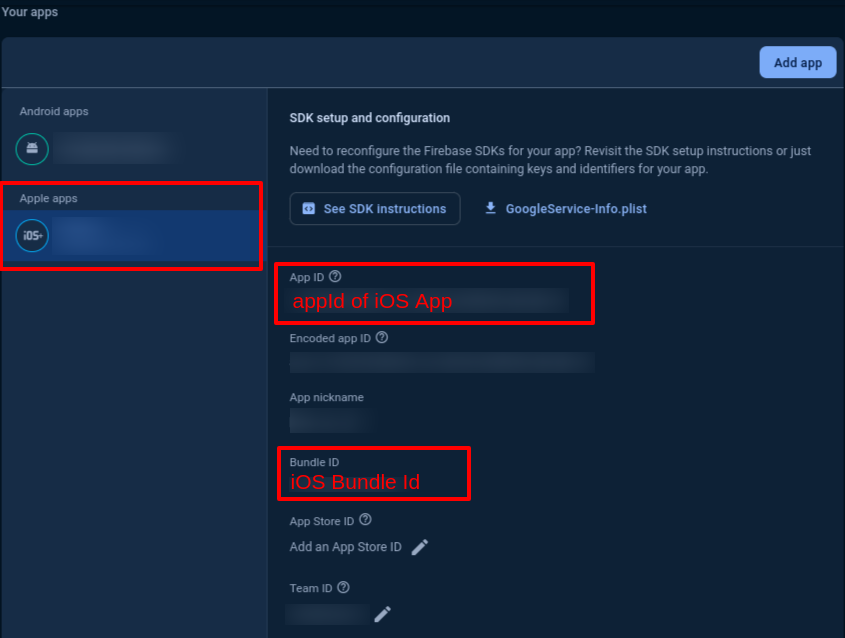
For Android App ID and iOS App Id
- Scroll Down and in Your Apps section you’ll find App Id in Android and iOS section.
Copy respective App ID and paste it to appId.
Copy Bundle ID and paste it to iosBundleId.
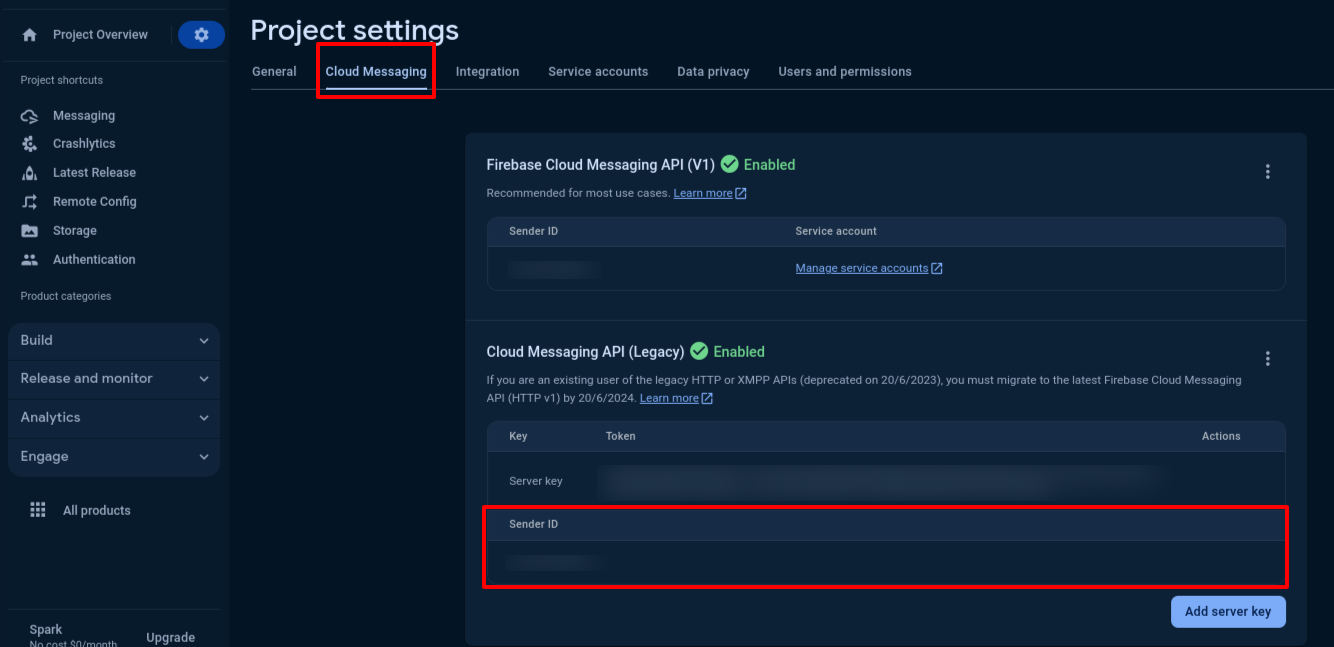
For messagingSenderId
Click on Cloud Messaging you will see Sender ID. Copy that paste it to messagingSenderId.
For storageBucket
- Navigate to android → app
- Open google-service.json
- Under "project_info" find "storage_bucket" and copy value and paste it into storageBucket.
Assign firebaseConfig in Firebase Initialization
- Open main.dart
- You will find Firebase.initializeApp in void main() method.
- verify DefaultFirebaseOptions is assigned to options.
await Firebase.initializeApp(options: DefaultFirebaseOptions.currentPlatform);